Wednesday, June 21, 2006

A year later

Well, I must say that I have not made any progress on the 911 for a year. Of course, deployment to Kuwait had a lot to do with it . Instead, I spent a year thinking, mourning, planning, rethinking, and anticipating this vehicle.

I am not sure when work on the vehicle will begin again. Presently the focus in my life is getting out of the Army and finding a different means to fund this project. Currently, I am considering giving up on restoring most of the car and just turning it into a track car. Funny thing is I think this will be cheaper in the long run. The difficulty will be keeping the car within emission standards for street use. We will see how motivated I am.

The car is running. It turned out that a crank sensor went bad and that was what caused the car not to run. Slightly expensive repair...Especially considering that the engine will have to rebuilt soon. (One of the head bolts sheared off) I also found out that the POS PO (previous owner) had the car MAACOed. The tird was so cheap he had them paint a single coat of black paint on top of the original paint and clear coat. Some people do not deserve nice cars. They are too ignorant to appreciate what they have. Funny thing is if the shape of the paint is any indication of how they treated the car, they probably would not have had to paint it the first time if they had taken care of it and kept it out of the auto car washes.

Oh well. So stay posted. More in the future...I hope.

Sunday, July 03, 2005

It Lived...if only for a second

Well, we completed everything I wanted to do. The brake job, valve job, some interior work, and the new tie rods. All that was left to do was put her back on her wheels and get an alignment.

We dropped her off the blocks and I jumped in for a test spin. The car sounded better than it had ever before. It idled smooth and throttle response was immediate. Almost immediately the brakes went soft but that was expected. I knew that it would take a little while to work all the air out of the calipers. Not mention contiually bleeding them will help get out any debris that might have gotten in brakes lines while we were working on them.

Everything looked good to go so I decided to take her out on the highway. Everything was perfect until she got to about 3000 rpms and she choked out a little, but kept running. I brought her back to the house we looked her over, but really had no idea what to do. We decided it was still driveable and we took her in for the alignment.

Fortunately, I was not there for the disaster. The mechanic took her out ffr a test drive and while he was driving her...she died. He tried to start it again but no joy.

At first we thought it might have been vapor lock considering it was around 100 degrees. However, after a considerable cool off she still refused to start. So we began to troubleshoot. It had be one of three things: air, fuel, or fire. Based on several observations, we quickly turned our attention to fuel. We assumed the car was not getting enough any fuel. Two easy culprits: fuel filter or DME relay. Unfortunately, neither fixed the problem. Since the fuel filter needed to be changed anyway, and it is advised to have a spare DME relay on hand...I figured no big loss.

Currently, my Dad is trying to find some tme to do a little more troubleshooting before we take her to the wrench. Personally, I have a hunch that the back pressure from the old fuel filter burned up the fuel pump. Right now, I do not know much more than that.

There will not be many more updates for a while because I will be in Kuwait for a year.

COST:
Alignment - $47
feul filter - $37
DME relay - $41
Hood badge, flapper box, etc. - $200
TOTAL - $315

Friday, June 17, 2005

Calipers and the pistons that bind in them

Well, what started out as a caliper rebuild quickly turned into a full blown brake job. The hardest part was waiting for parts. Actually that held progress up more than anything else.

We left off with the calipers having been removed from the car. Well, to rebuild we have to get the pistons out. Come to find a couple of the pistons in my calipers had seized completely. So getting them out took some real doing. The best method was using air pressure...unfortunately we figured those out after practically destroying two piston heads. Here are some pictures of the brakes:

Image hosted by Photobucket.com 
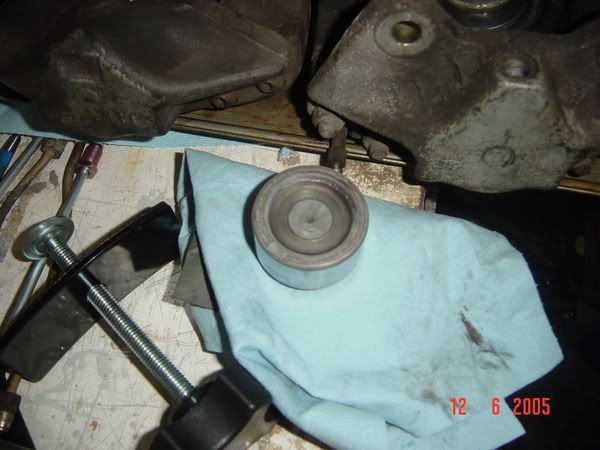
Here is one of the pistons from the front driver's side. This caliper had all kinds of funny stains in the pistons.

Image hosted by Photobucket.com 
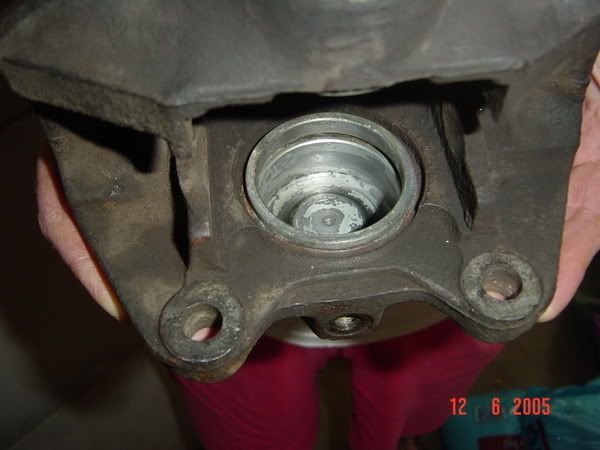
this a picture of a caliper cylinder. Above where the piston seal goes you can see the result of a lot of corrosion. I believe that is why this one seized.

Image hosted by Photobucket.com 
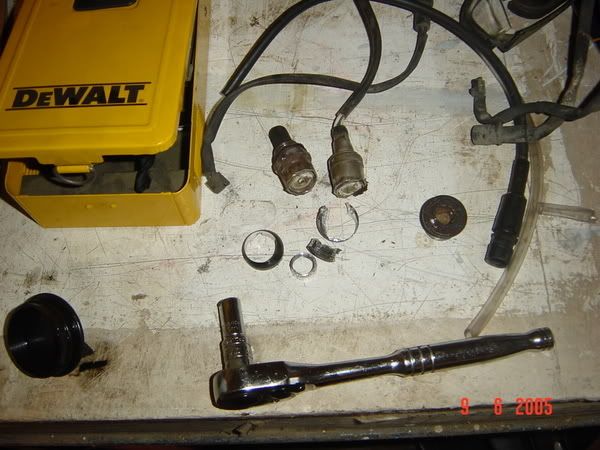
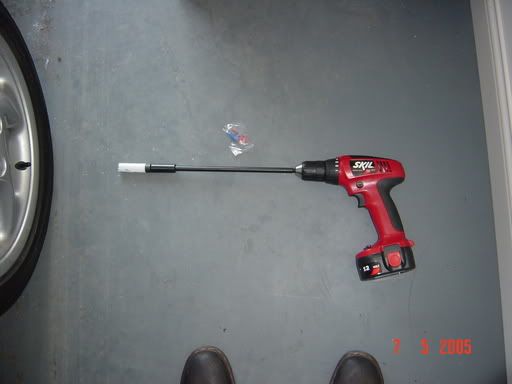
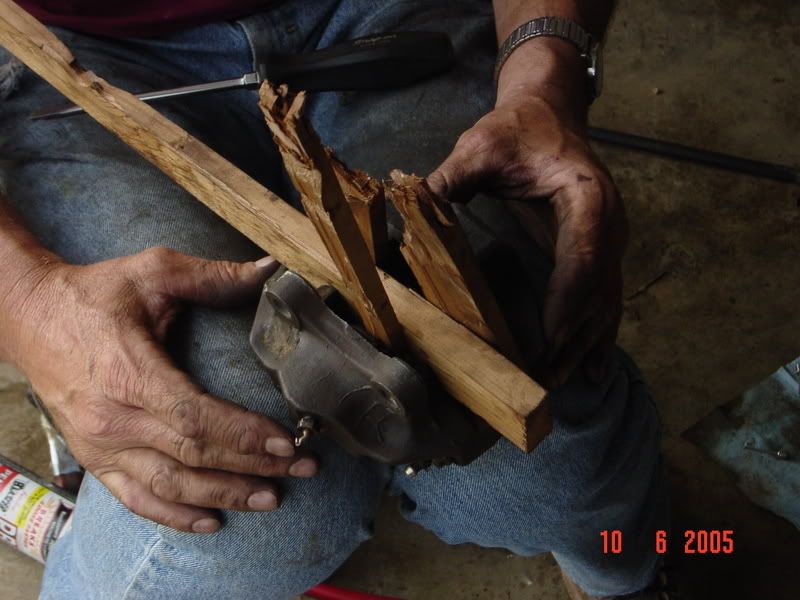
This is how we braced the pistons before hitting blowing pressurized air into them to force out the pistons. To quote my father "It looks like an abortion." Not the most professional looking, but it worked.

Image hosted by Photobucket.com 
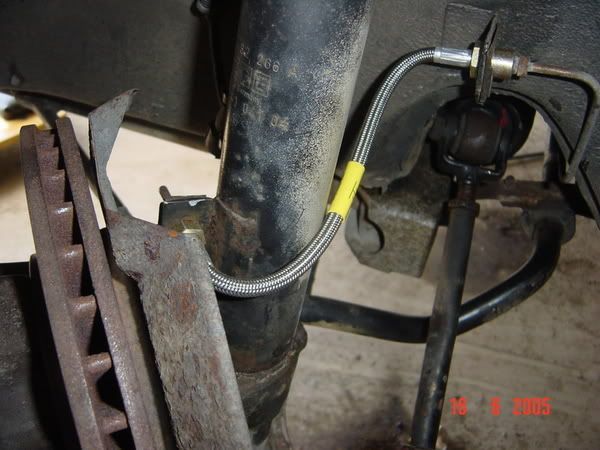
My new shiny stainless steal flexible brake lines. SWEET!

Image hosted by Photobucket.com 
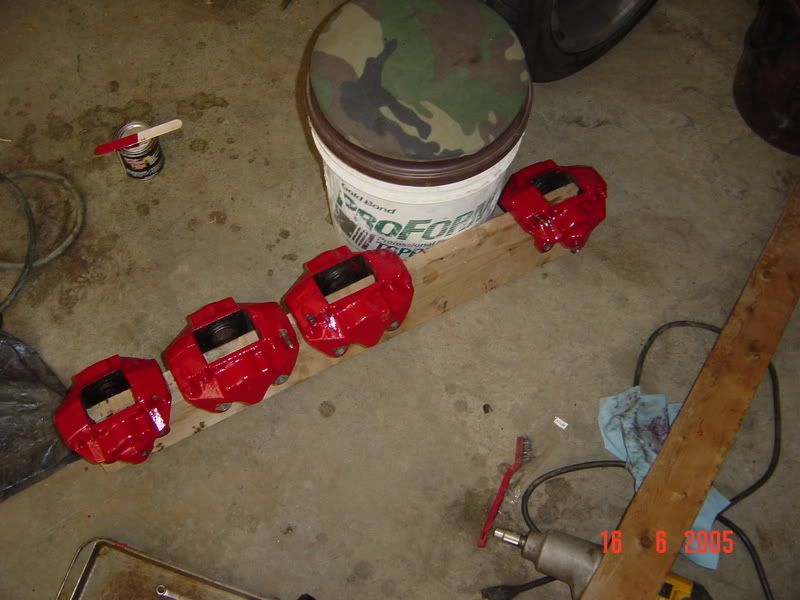
I also decided to paint my calipers. The aftermarket wheels expose them too easy not to add a little color to them. I cannot wait to see these mounted.

Image hosted by Photobucket.com 
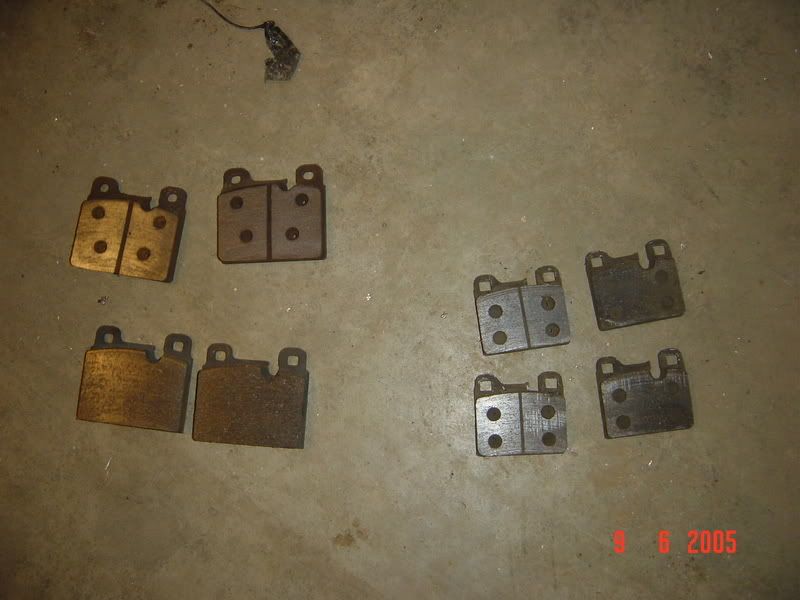
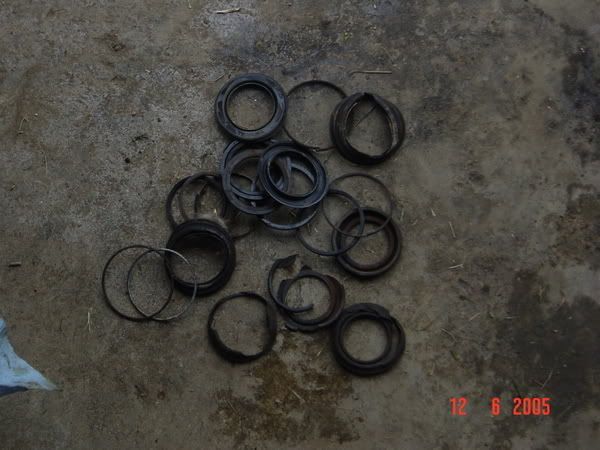
This is a picture of all the seals and rings that I pulled out of the calipers. They had seen better days. Most of the rubber just crumbled.

Presently this project is not complete but it is close. My father managed to break a parking brake retainer spring that is so rare it can only grow in two places in the world. Once we get that spring and put the parking brake back together; we can assemble the whole brake system, bleed the brakes and test our work. I have a feeling this could be an adventure. Especially if the brakes fail on the road. I prefer not to think about that.

In the meantime we have been taking down some other projects on the side. I changed the spark plugs...twice. First time I mistook units of the gap distance so the were set at .08" instead of .08mm. It is amazing how something so minor.... After the second time I got the gaps right in made a huge difference. I also replaced the spark plug wires. This was the first time anyone had...ever. The wire still had Made in West Germany written on them. I thought I was done with the ignition system until I opened the distributor. All the points and rotor are corroded so now those are on order. The car still runs but they will need to be replaced. Looking at the old spark plugs it seems the engine was running fine...they did no have any significant deposits or discoloration. Here is one of the worst ones:

Image hosted by Photobucket.com

Image hosted by Photobucket.com 
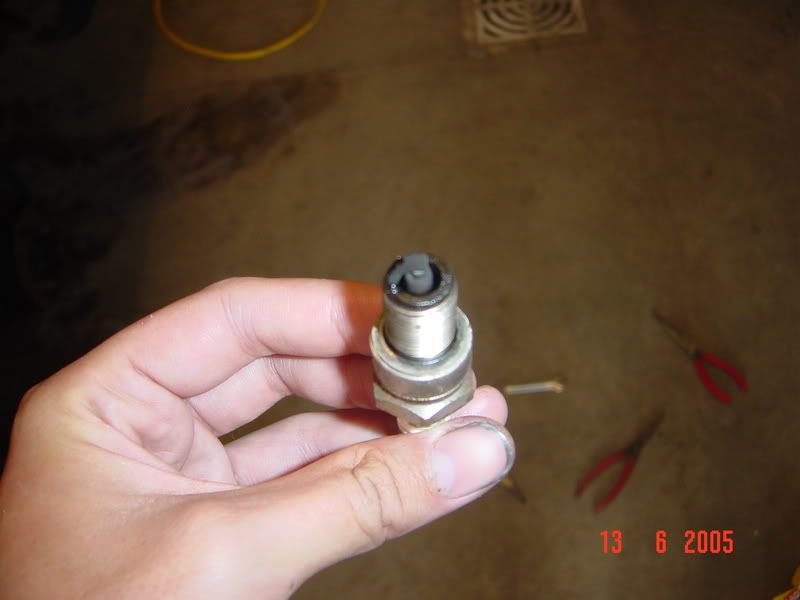
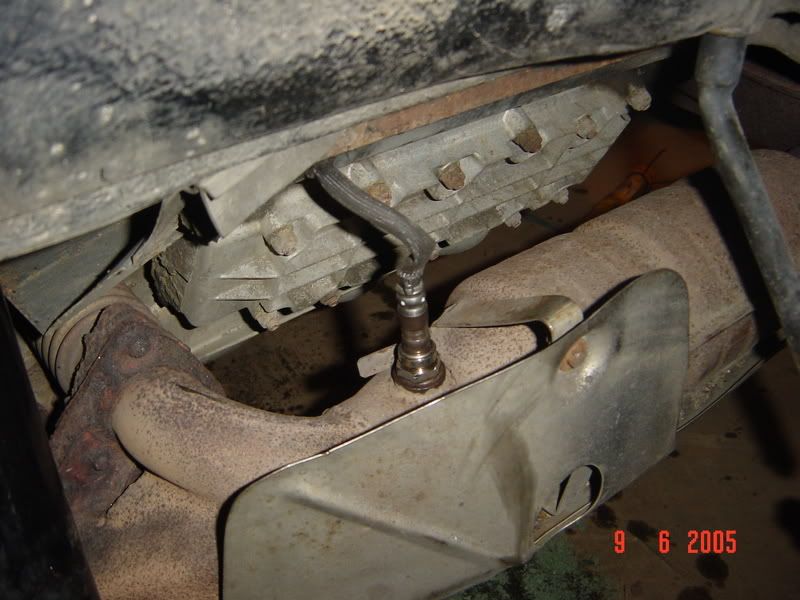
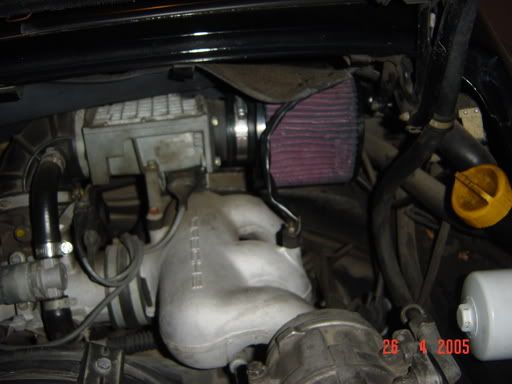
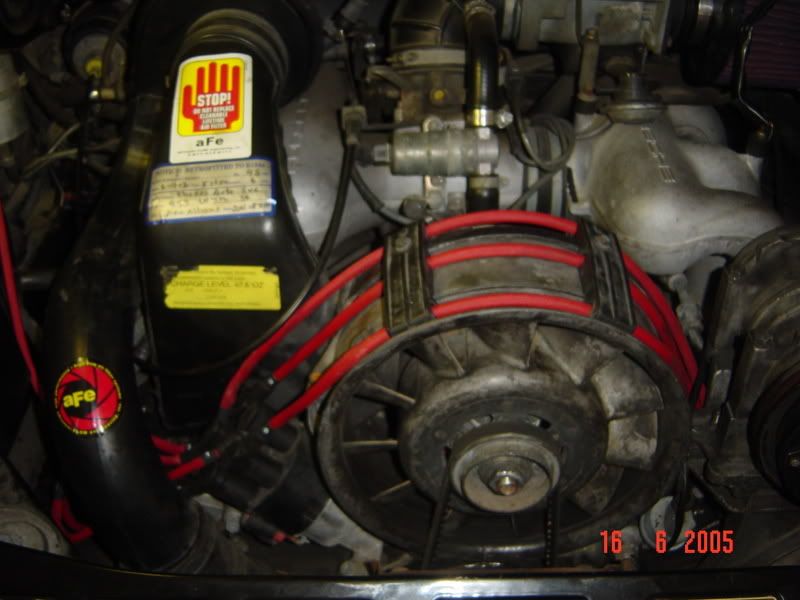
My new high performance spark plug wires. I seriously bought them because they were $100 cheaper than the OEM wires.

We also replaced the tie rods. The original one's rubber was completely rotted away in parts. This created some serious play in the steering wheel. I put the upgraded 911 Turbo tie rods. These have almost no rubber in them so they never wear out like the Carrerra ones do.

I finally got all the special screws to put the doors back together. So that will be coming soon. I hope that the next installment will have this car on its wheels again.

PRICE for the Installment (I always hate this part):
Cap, rotor, new hood badge, etc. - $191
Emergence brake springs, flapper box, etc. - $159
Door seals, caliper rebuild kits, tools, etc. - $141
Miscellaneous stops at the local auto parts store - $50

TOTAL - $540 (and we are not done yet...yikes)

*one caveat: A Porsche dealership charges $3000 for a brake job of the magnitude we attempted, and new calipers are $280 a piece. So I saved what money I could.

Friday, June 10, 2005

And the dam bursts

Well, just to warn you this will be a long one...I have been working on the car non-stop for the past two days. The wheels are finally off with the assistance of my father. We did some damage to the wheels, but it is really minimal compared to what the PO (previous owner...who will forever be cursed in this tome hencforth) did when he or his hack mechanic tried to get one the wheels off. For a moment, though, let me step aside and postulate on how he came about his discission to sell the car.

One day he has a flat or for some reason the car needs to have the passenger side tire looked at. Now at the time either he comes to realize he has lost the key to his $50 lug locks or the mechanic in his exuberation strips off all the teeth...which is known to happen with this design. He then told the mechanic to get them off anyway he can. The a cacophany of drilling, grinding, and otherwise wanton destruction ensues. When it is all said and done the wheel comes off but there is about 5 grams of metal missing on the inside of the wheel. This was probably very expensive for the PO because of the time required. However, the tire is fixed and he goes on his merry way. Then one day the rear drivers wheel goes flat (there was a nail in it) and he realizes that he will have to go through the same thing again. Since, the car had been sitting in the backyard anyway he decides to sell it. (he told me it was garage kept but that is just not possible considering where the rust and rot are) Then along comes me.

Alright back to the car. Here is a picture of the wheel the PO's mechanic annihilated...fortunately he did not do too much damage to the lug seat so the wheel is still good just a little harder to balance:
Image hosted by Photobucket.com

As it turned out the hole saw was actually working there was just a little lip on the remnant. Once we chewed that off we were home free. Of course, not before attempting an alternate method on the front driver's side wheel. My dad thought he could drill the bolt out by going straight down the middle. That did not work because (as I predicted it is almost impossible to stay centered. The wheel came off but this is the result:
Image hosted by Photobucket.com
Image hosted by Photobucket.com Notice the recessed bolt.

So now my car finally has no wheels. I am free to do all the things that the wheels have interfered with.
Image hosted by Photobucket.com

THe first thing I went after was my other nemesis the O2 sensor. Sadly, he still maintained his death grip on my catalytic converter. Pull and pull I did...still no joy. However, since the car was on blocks now anyway and did not hvae to go anywhere anytime soon...there was no reason not cut it. The cutting broke its will to hold on and soon we had freed it from the cat. Here are his remains along with the wheel locks.
Image hosted by Photobucket.com

Here is his successor and my car no longer smokes nor idles rough:
Image hosted by Photobucket.com

After that replaced teh transmission fill plug that I had earlier destroyed, and drained the oil. I had postponed changing the oil because I had the change the S-hose coming off my oil reservoir. It was causing the only oil leak on the entire car...it had to go. Here is a pic:
Image hosted by Photobucket.com I knew this was going to be messy, but I was prepared, I had three oil pans standing by. When I got the oil drain plug off the crankcase...the ensuing stream shot right past oil pan one. Then when I pulled hose off the reservoir more oil was left in the reservoir than anticipated and it overfilled oil pan #2. Once the S-hose was off I had three places on the car dripping oil, which was no problem because I had three oil pans. Unfortunately, I realized too late that oil #3 had a hole in it. I should be the poster child for Clean Sweep.

Once all the oil was empty I reinstalled the hose, filled the car, and ran it. No leaks and no smoke. My new hose held. WIth those projects completed. I turned my attention to the brakes and suspension. First, we pulled all the pads. I noticed that the car pullls to the right under hard braking and braking is generally stiff. So we started out by pulling the brake pads. If you look closely you may notice what is wrong in the picture (fronts on teh left rears on teh right):
Image hosted by Photobucket.com
If you can't see it, one of the front wheels had a completely different set of brake pads. FYI different brands and styles have different coeffients of friction...which would explain the pull. Yet another demonstartation of a hack mechanic. Fortunately, I have a new set of pads on hand and will replace the whole set even though they are not out of tolerance...they have all just worn differently. Based on that I knew I had to rebuild the brake calipers...except for the front pasenger side one that looked as though it had been recently rebuilt. Since, I had to pull the calipers I purged the brake lines. Once the calipers were off I dropped them into the parts cleaner and I will clean them more throughly after they marinate.

Last thing I did was inspect the tires and try to get the fronts wheels balanced and the rear whell patched. Turns out the tires were never rotated so the front tires are pretty much done. Then when the guy tried to balance the other one it turned out oblong from internal damage so it was bad too. I have not boutgh tires yet, but it really sucks to know you have to replace tires that had tons of good tread left on them because someone did nto take care of tehm.

That about c0mpletes it for now. Many projects ahead and I may get them all done while I am on leave.

Price:
Tie rods, spark plug wires, and small parts: $357.35
Tire patch: $12
Brake lines, seat bolts, brake line: $185.95

TOTAL: $555.30 (are we having fun yet?)


Wednesday, May 25, 2005

The wheels that refused to play

Well, I see that it has been a month since I have posted anything about my car. Truth of the matter is that I have not done too much too it. All projects are currently held up by the fact I cannot get the wheels off. I have made some progress on the locks so far. I bought a 3/4" hole saw and was able to cut off most of the lock on one wheel. However, little piece of it that remained was still big to get the wheel over. I have tried everything I can think of to get that little piece off but do to its depth in the wheel it is hard to find tolls that can reach it or get needed angle on it. I have bought a lot of tools trying to get something to work. I think my purchases alone are enough to keep Sears from going bankrupt. Here is a picture of the weapon I used on the locks:

Image hosted by Photobucket.com
Here is a link to the discussion I have been having on a technical forum about the wheel locks: http://forums.pelicanparts.com/showthread.php?s=&threadid=218867&highlight=wheel+lock+hell


At this point I have exhausted my abilities.My Dad is going to drive down and with a trailer and we are going to carry the car to SD. There I will have my Dads tools to play with. There I will attempt cut the bolt with the wheel lock on it from behind the wheel. Somehow that plan will fail I just have not figured out how.

In the meantime, I have a lot of spare parts backed up waiting for the wheels to come off. I did manage to get the driver's seat out and I am ready to put the racing seat in. Here is the car minus its shot driver's seat:

Image hosted by Photobucket.com

PRICE:
Tools - near $400
Parts - $30 (S-tube for the oil system)

Tuesday, April 26, 2005

Death by a 1,000 papercuts

Well, it has been two weeks since my last post. Not a lot has happened since then. Mostly road blocks and detours that led nowhere.

My biggest hang up at present is the wheel locks. No one can get them off. No one knows who made them. All I know is that they make me want to cry. I am quickly running out of alternatives beyond just cutting the wheels off. Not only will that be expensive but also possibly destroy wheels, hubs, and possibly the rotors. Can I get a "GRRRRR!!!"? Here is a picture of one of the culprits:

Image hosted by Photobucket.com

I have also taken to tearing apart both doors. Mostly to work on a couple of glitches in the lock system and replace some power window switches. Well as I started taking thing apart I found more and more stuff that was wrong. Most importantly the backing of the interior door panels was pretty much completely rotted out from getting wet. Hence, I am replacing them. Cool thing is I took this chance to upgrade from vinyl to leather. I found some leather door panels on eBay for $100 less than new. I also have to replace almost every insert that holds the door panels on be because the screws that were screwed into them to hold on the door panels...seized. The inserts are plastic by the way. So I had to tear out all to the bad inserts, which was basicly all of them. I have never seen that before. Here is a pic...the inserts were along the bottom of the door.

Image hosted by Photobucket.com

This next pic gives you an idea of the condition of the door panels:

Image hosted by Photobucket.com

Unfortunately, I cannot get the passenger door panel off due to one hex nut being stripped out. (I think it however installed the aftermarket speakers stripped it out) SO the passenger door panel is being held in place by one relentless bolt. Go figure with my luck. I will probably have to pound a torx head into it to get it out.

My box of removed parts is quickly filling up. My first instinct was to throw a lot of this stuff away, but then I looked at replacement prices...I figured it might be best to keep them around in case I changed my mind. Replacement value of this box is honestly about $1000.

Image hosted by Photobucket.com

One other project I did was clean the lifetime air filter the previous owners put on. It had absorbed an extensive amount of oil because the oil overflow blow off valve is very close to it. I did not think that it was malfunctioning or limiting air flow...but better safe than sorry. The refreshing oil turned it red:

Image hosted by Photobucket.com

Price for this installment of the blog:
Door panels: $200
Brake pads, fluid, caliper rebuild kits, sensors, etc: $258
New racing seats (I just ordered them): $299
TOTAL (too much to bear): $757

This installment of Project Porsche was brought to you by the tax man...who gave me an incredible return this year.

Sunday, April 10, 2005

1st Battle in the War of the Seized Bolts

Well, this weekend I set out to do some of my first projects on the car. Replace the O2 sensor, change tranny fluid, check the brake pads and rotors, and replace all the hood shocks front and back. I figured this would only take a couple of hours...easily accomplished in the morning. It is amazing how far from reality time estimations can be.

First the O2 sensor. Everything was going great until I got to the point where I was actually removing the old sensor. Apparently, catalytic converter really liked the sensor because it refused to give it up. After much pulling and consternation, we decided on plan B (remove the wheel and torch converter until it gives up the sensor. Unfortunately, the wheels had wheel locks and I did not have the key for the locking lug nut. So project 2: FAILURE after three hours. This discovery also made brake, rotor and tie rod inspections impossible.

disappointed, I regrouped and set about changing the tranny fluid. The book says 1/2 hour...it took me 2. Once again seized bolts did me in. It sounds relatively simple: remove plugs, empty, replace plugs, fill. However, the plugs are steel and the transmission is aluminum...constant heating and cooling = death grip. With a breaker bar I finally got the drain plug off, but ended up stripping the head of the fill plug. So right now I have managed to back myself into a corner, because I have no tranny fluid in the car and no way to add any. I felt sick. Fortunately, one of the craft shop mechanics knew a trick and used a center punch and hammer on the outside of the plug to break it free. PHEW!! What a huge sigh of relief. Filled it put everything back to together: SUCCESS. It was 2:30 (I showed up at 9).

I went home, had some lunch and starting thinking about doing something else with what remained of the day. Instead, I kept thinking about the hood shocks. By 3:30 I was outside and again under the hood. Fortunately, this project went very smoothly and all four were changed within the matter of an hour: SUCCESS. No the hood no longer falls on my head.

Side notes: Once I got the car up in the air I easily identified the oil leak. The hose coming off the oil reservoir is cracked. A very easy fix. Also, looking at all the rusted bolts...I am probably going to be investing in a tap and die kit soon. I would have pictures but I forgot my camera.

Cost:
Craftshop bay cost: $10
Air filter recharger kit: $10